How to Get Started with a WordPress Blog: The Definitive Guide
Post last modified: Last updated on by Editorial Team
Getting started with WordPress blogging can be overwhelming and intimidating, but don’t worry we will help you to start a blog and make something awesome for your business or project.
Some guides get people confused and leave them scratching their heads. If you’re on the same bandwagon, don’t let this stop you from creating the best blogging platform. All you have to do is follow this guide and start a blog from scratch without any hassle!
What Do You Need to Make a WordPress Blog?
Firstly, you’ll need a domain name and a web hosting service.
Choosing a domain name
When getting started with WordPress, another crucial step to think about is choosing a domain name. This is because a domain name will represent your overall brand. Therefore, it must be well thought out.
A good domain name should be short, unique, and easy to spell and remember. You don’t want to turn away visitors with a hard-to-remember or hard-to-spell name.
Once you’re happy with your chosen name, it’s time to check if it’s available and register it. These are the best places to buy a brand new domain:
Choosing a web hosting service
To create a WordPress website you need to find the right web hosting provider. There are some important points to consider when choosing a hosting provider:
- How many resources your website will need
- What your plan is for the next 12 months
- How big you think your site will grow.
- A stable and operational web hosting 24/7/365 is essential.
- Customer Support: How much customer support is available and what options do they offer to contact support (e.g., phone, email, chat, etc.).
- Easy to use: Many website owners have no programming experience, so ideally the control panel should be easy to navigate.
- Affordable: Budget and cost are important in the long run when building a website. You don’t want to pay more for a web host that doesn’t suit your needs.
A domain name costs on average $12.99 a year and a web hosting plan costs around $8.99 a month.
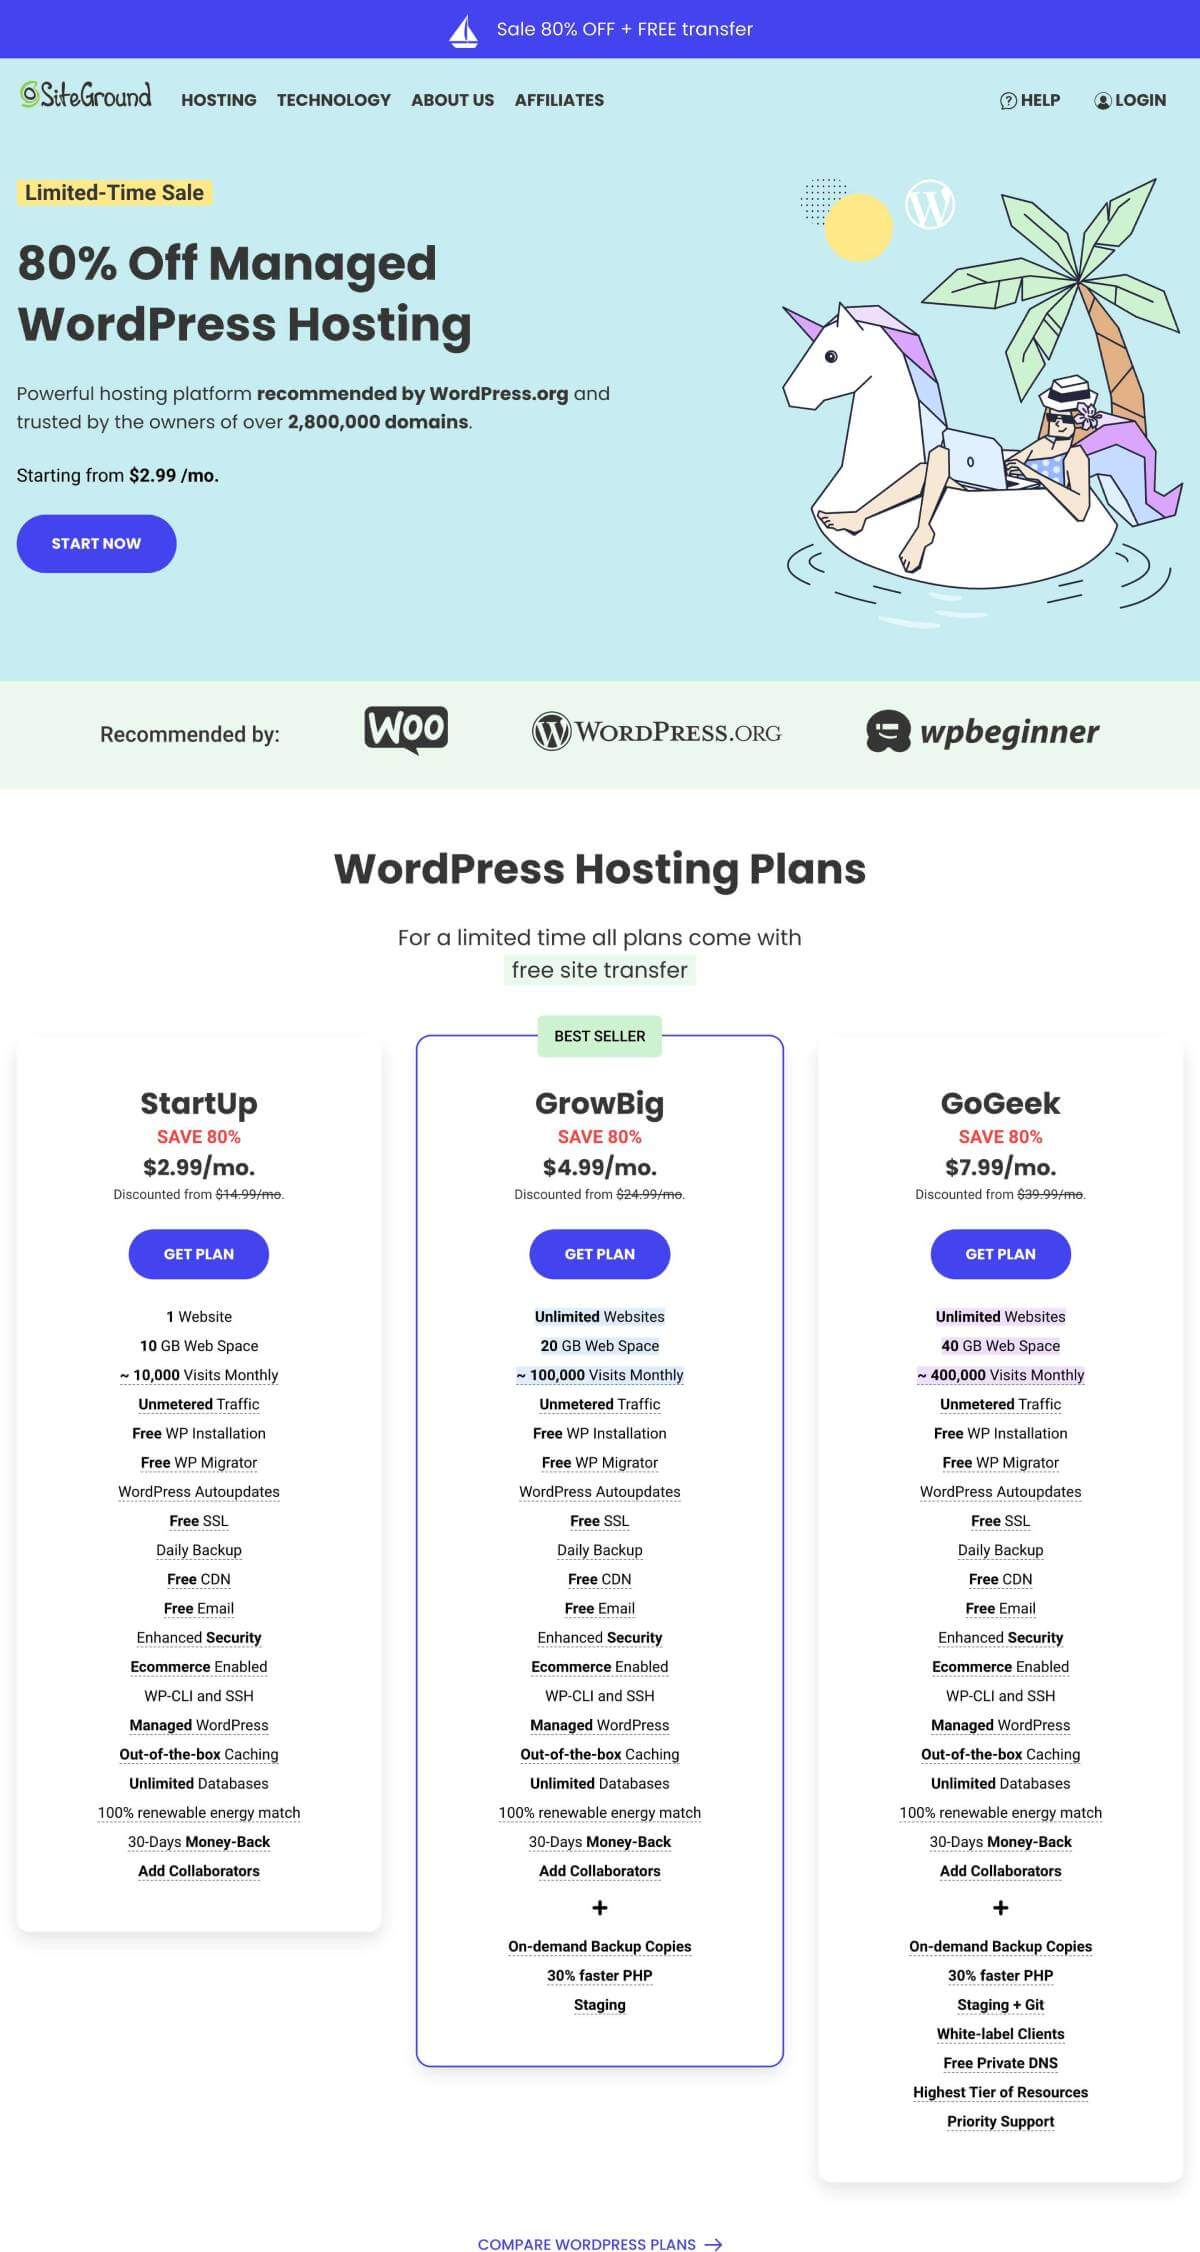
Siteground is our favorite option for registering a new domain and also signing up for a hosting plan. Siteground is a powerful hosting platform with fast speeds, a user-friendly interface, and solid customer service recommended by WordPress.org
You can also use different WordPress hosting companies like Bluehost or WP Engine and still be able to follow our blog setup tutorial.
Note: If you sign up with Siteground using our referral link, we will earn a small commission at no extra cost to you. We only recommend products that we use personally and believe will add value to our readers.
Let’s go ahead and sign up for a new account on Siteground.
Creating a New WordPress Site with Siteground
Open Siteground on a new tab and click on the View Plans button to get started.
You will see all the features and pricing for each plan. We recommend the “GrowBig” plan because it represents the best value and has plenty of resources and 30% faster PHP that will guarantee top speed.
At the time of writing this guide, there is an 80% discount available for the first year of service, which makes the “GrowBig” plan only $4.99 per month.
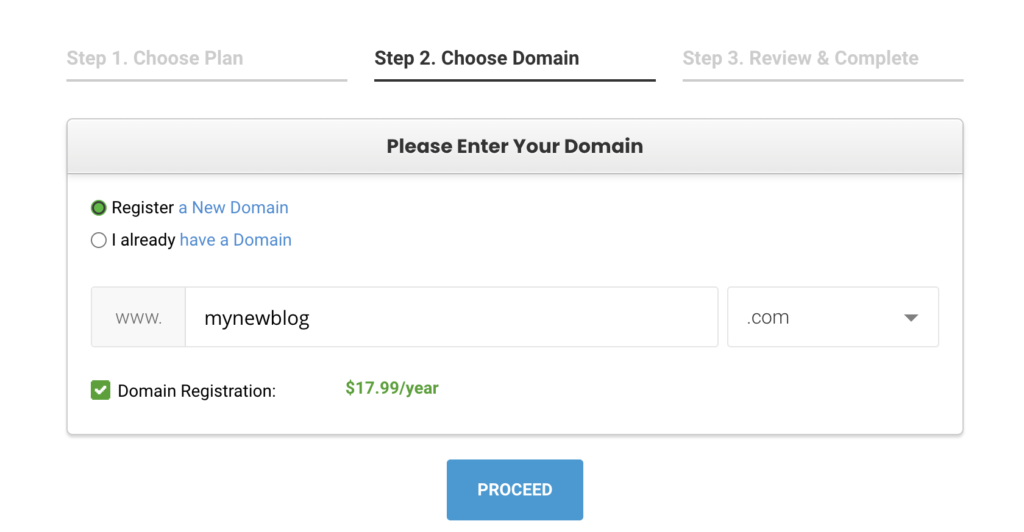
Click on the “GET PLAN” button. On the next page, you can either register a new domain or use a domain that you already have, then click on the “PROCEED” button to continue.
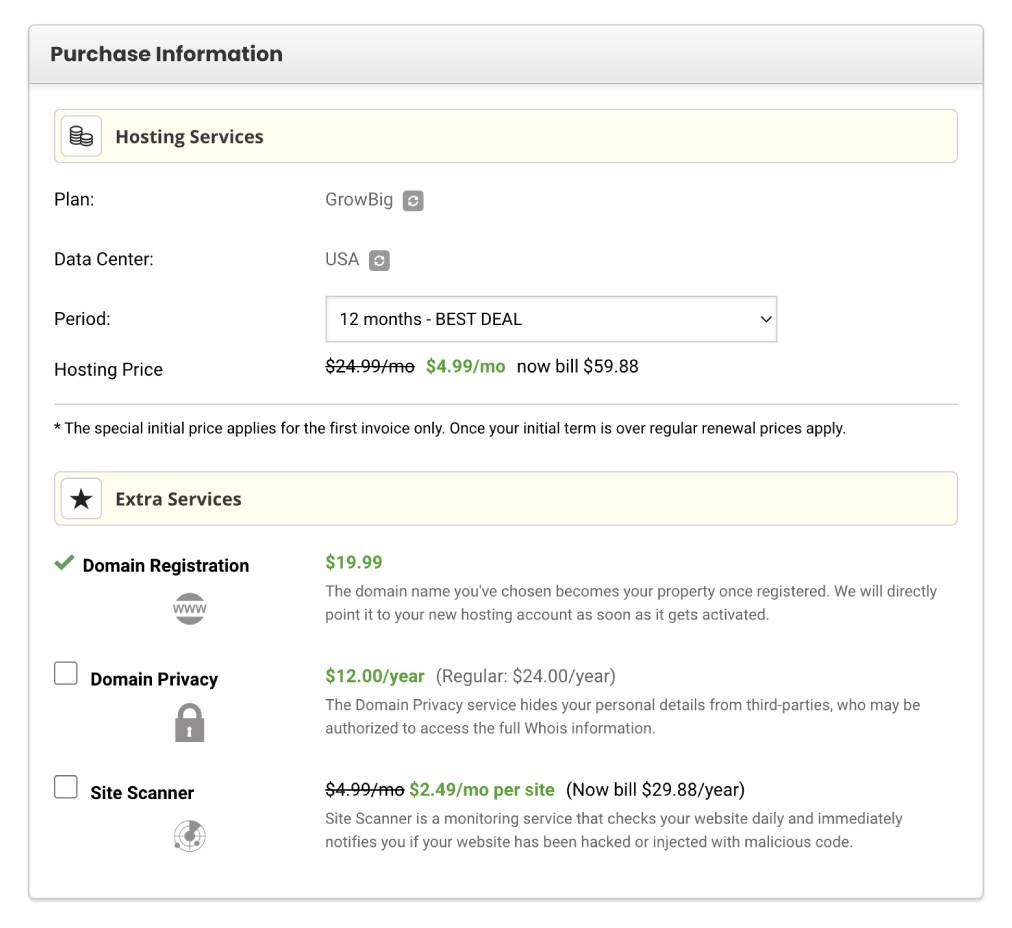
Complete the checkout process by entering your account and payment information. On this screen, you’ll see optional extras that you can purchase. It’s entirely up to you whether or not you purchase these. We generally don’t recommend purchasing them right away. You can always buy them later if you decide that you need them.
Setting Up the WordPress Blog
Once the purchase is completed, you will be redirected to the customer’s home page. Here you will see a welcome message and a button to start your new WordPress website setup.
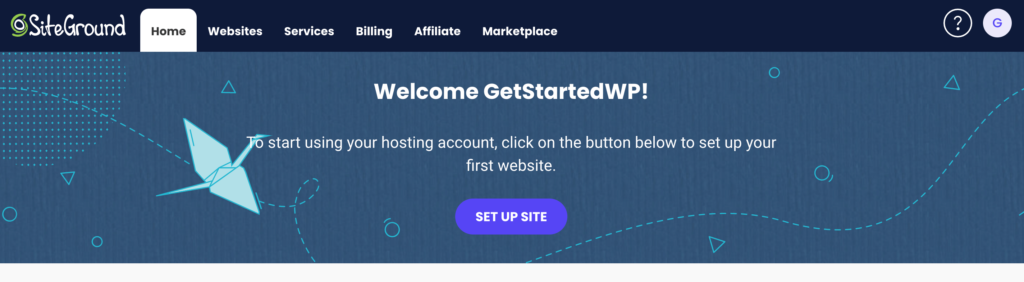
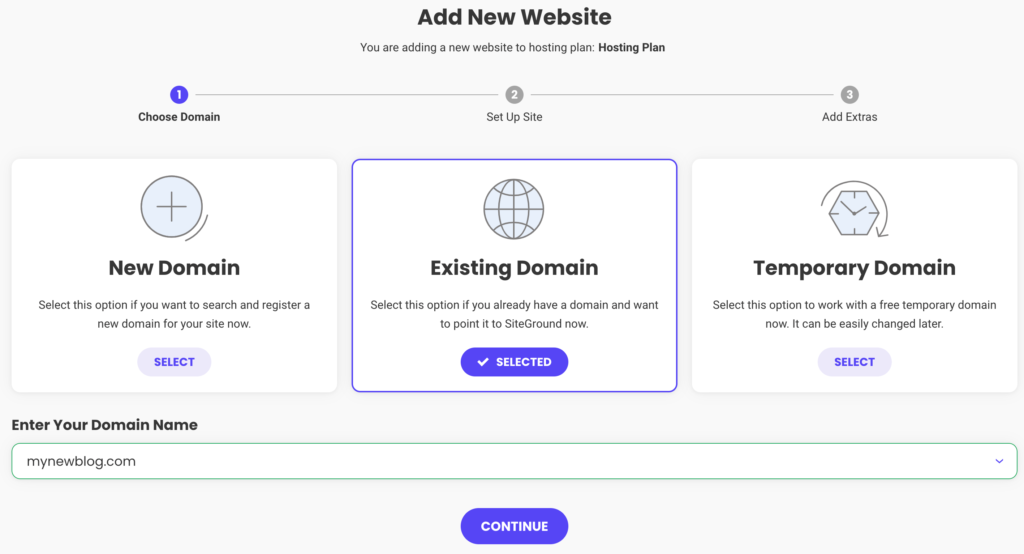
Go ahead and click on the “SET UP SITE” button. It will take you to the Website Wizard page. On this page, you will see three options, select the “Existing Domain” option, enter your domain name in the field below and click on “CONTINUE”.
We’re almost there! On the next page click on “Start New Website” and select “WordPress” from the boxes below.
Enter the credentials for your new website. The email address will be used as a username for the WordPress admin user and we recommend using a strong and secure password. Avoid using common phrases or words like admin, password, qwer, etc.
Click on the “CONTINUE” button and let’s finish setting up the new website.

Siteground will take a few minutes while it completes the setup.
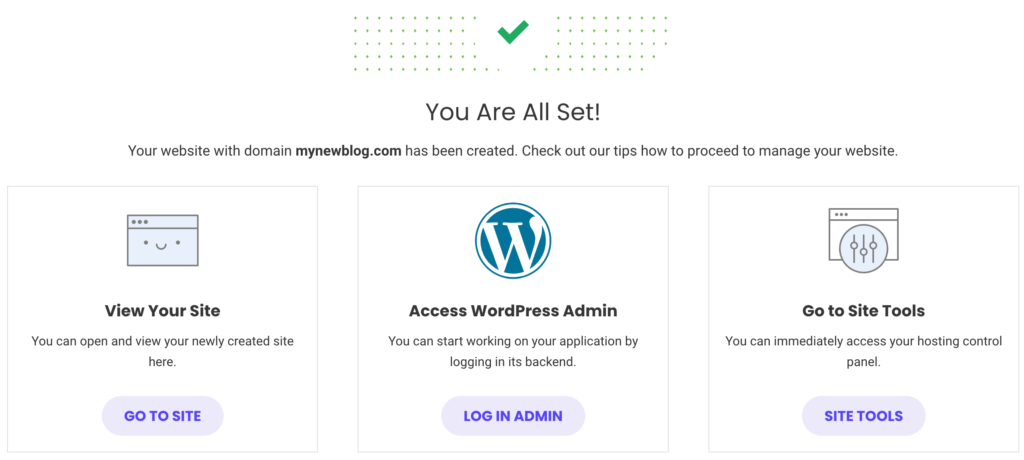
You’re all set! The website has been created and now you’re ready to start managing your new WordPress website.
If you purchased the domain with Siteground, they automatically connect the domain name to your account with all DNS settings, otherwise, you will need to configure the DNS settings on your domain registrar company to point the domain to Siteground servers.
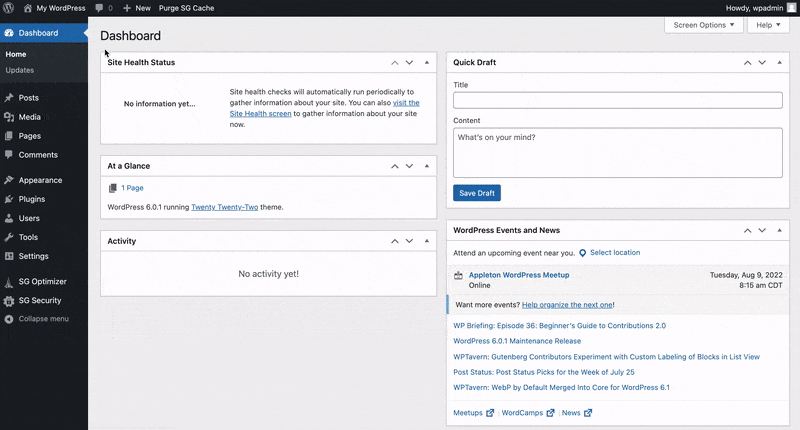
It’s time to access your WordPress dashboard and start customizing it to reflect your brand. Click on the “LOG IN ADMIN” button.
Choosing Your WordPress Theme
Themes are an essential part of WordPress and they control the design of your website. Your theme will affect multiple areas such as:
- Branding and aesthetics
- User experience and accessibility
- Performance and speed
- Functionality
As such, you want to spend some time choosing the perfect theme. We’ll share some tips on how you can do that, as well as where to find free or premium themes for your website.
How to choose a WordPress Theme
There are thousands of WordPress themes available and it might seem impossible to choose the best one, but don’t worry, we’re going to share some tips for picking quality themes:
- Check the reviews and ratings – It’s helpful to know what other people’s experiences are. Most themes include user reviews and this is a good way to validate a theme’s quality.
- Check for recent updates – You want to make sure the theme is under active development and is being updated regularly to catch up with the latest WordPress version.
- Theme performance – A lightweight theme is a good choice for the long run. You don’t want a theme that’s cluttered with features that you don’t need or want. It affects your website’s speed and negatively impacts your SEO ranking.
- Check the demo on different devices – Responsive design is crucial. Most of the internet traffic comes from mobile devices, so a theme that works and is easy to use not only on desktops but on smaller screens is essential.
How to Install a WordPress Theme
Install a WordPress theme in a few simple steps:
- Go to “Dashboard” > “Appearance” > “Themes” – Here you’ll see a screen that contains the themes that you have installed and the theme that is currently active.
- Click on “Add New” – This will open up the official WordPress theme directory page and here you’ll see the most popular themes and the latest additions. If you bought a premium theme, you can install it by clicking on the “Upload Theme” option at the top of the screen and selecting your theme’s zip file.
- Choose one of the available themes in the directory and click on the preview button to see how your site will look like with the selected theme.
- Once you’ve chosen your favorite theme, click on the “Install” button.
- Wait for WordPress to install the new theme and then click on the “Activate” button.
Your theme is now activated and ready to be customized.
How to Customize a WordPress Theme
On your WordPress dashboard, click on the option “Appearance” > “Customize”. Depending on the theme you choose, there will be different customization options that let you configure your site design and functionality.
Some customizations require a WordPress child theme. A child theme inherits the looks and functionality of a parent theme and when you make changes to the child theme, they are kept independent from the parent theme.
If you are interested in learning how to create a WordPress child theme, we have created a tutorial, check it out here.
Creating Posts in WordPress
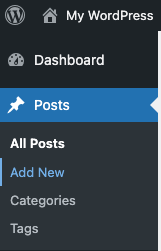
It’s time to add new content to your website! On your WordPress dashboard, click on “Posts” > “Add New”.
You’ll see a new page with the WordPress editor. Here you can set a title, add content blocks and use the settings on the right sidebar menu to write and publish your first blog post.
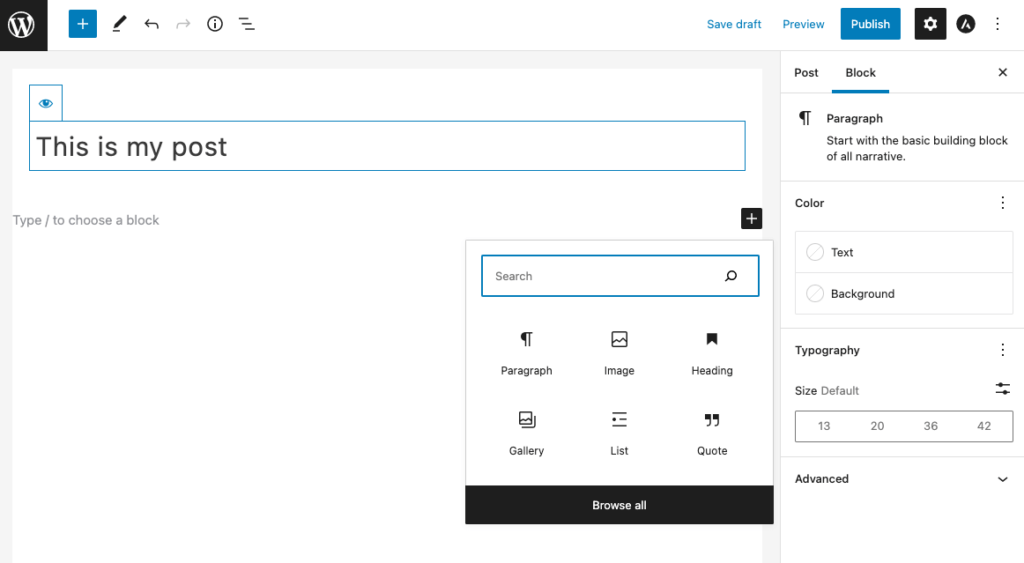
The WordPress editor uses a block-based editor that allows you to add content using Gutenberg blocks. A block is a piece of content that is used to create layouts, add images, text, and even media such as videos and audio.
If you are interested in learning more about it, we’ve written a comprehensive guide that explains how to add posts and pages in a WordPress site.
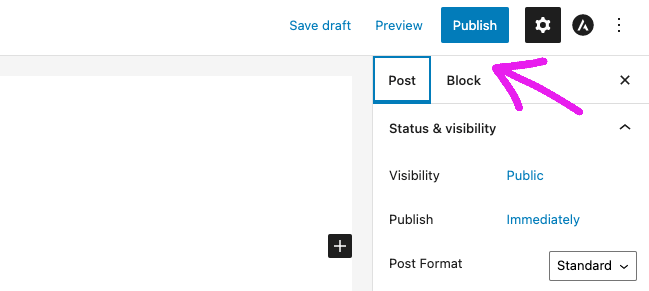
Once you are ready to publish your content, click on the “Publish” button at the top-right corner of the screen. This will make your post public and available for your readers.
What is a WordPress Plugin
Plugins are pieces of software that add extra functionality to your WordPress site. They can be simple such as adding a custom logo to your login page or advanced such as transforming your blog into a fully integrated eCommerce site.
How to Install a WordPress Plugin
Installing a WordPress plugin steps:
- Go to “Dashboard” > “Plugins” > “Add New” – Here you’ll see the WordPress plugin directory, sorted by Featured, Popular, and Recommended.
- Use the search field to search for a specific plugin or if you bought a premium plugin, you can install it by clicking on the “Upload Plugin” option at the top of the screen and selecting your plugin’s zip file.
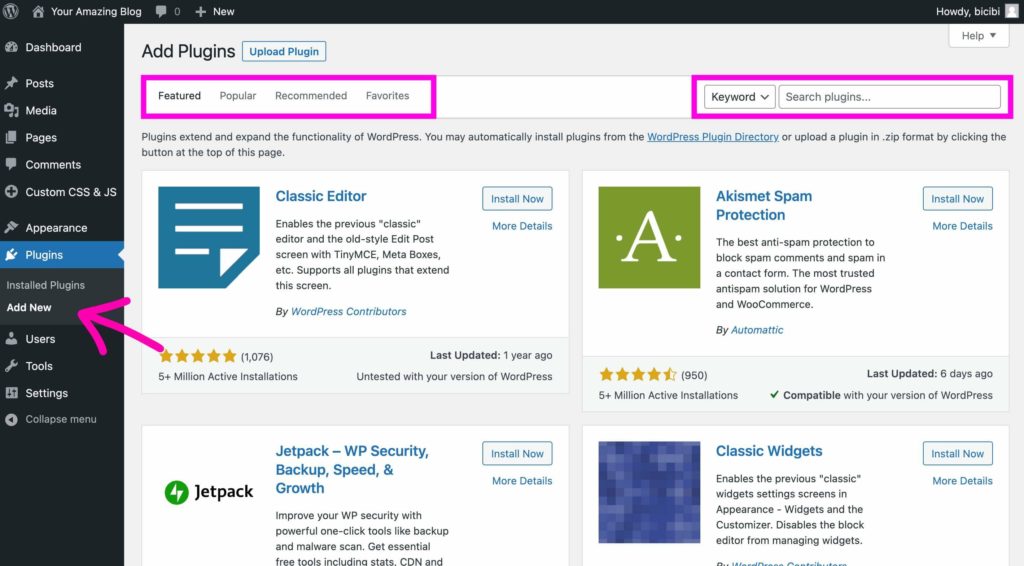
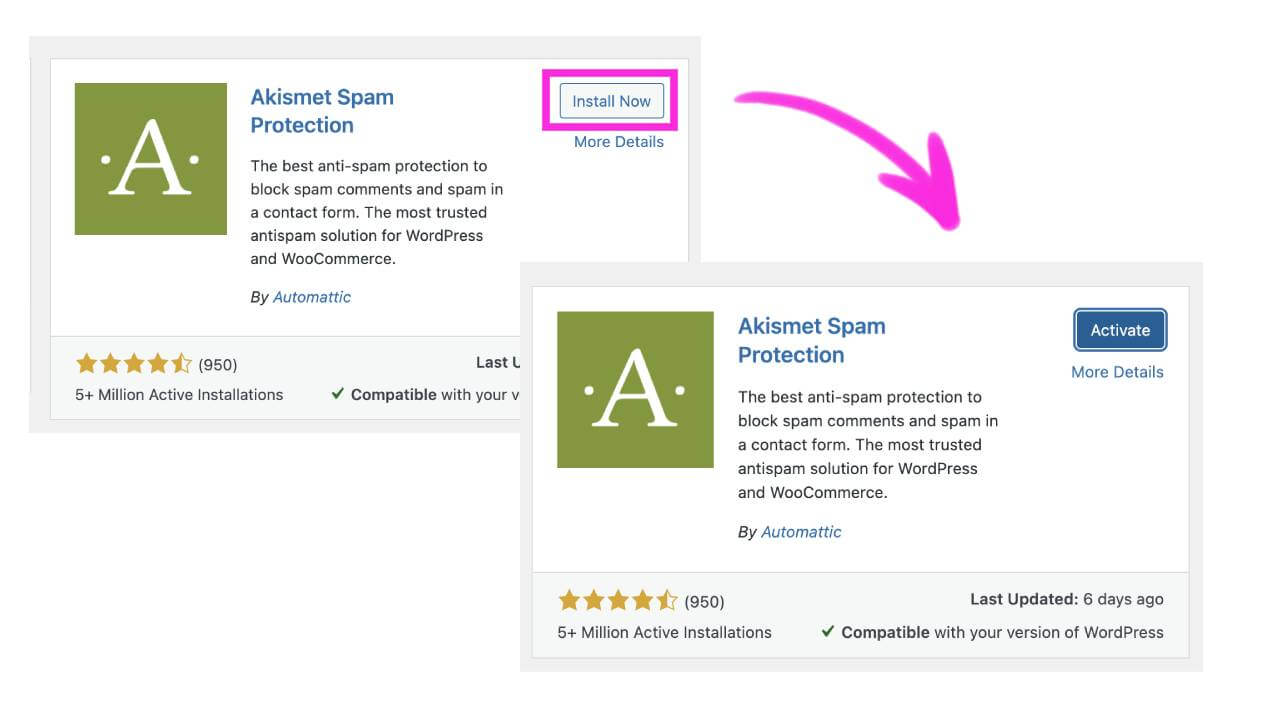
- Select your plugin and click on the “Install Now” button.
- Wait for WordPress to install the new plugin and then click on the “Activate” button.
Configuring Your WordPress Blog
The settings section controls some of the most basic configurations and important settings for your site. Here you can configure the site’s title, tagline, and location, who can register an account on your site, and how dates and times are displayed.
You can set your homepage and blog page and also set default settings for your posts and comments.
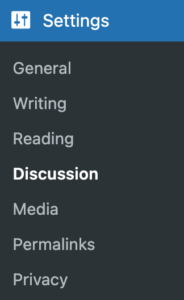
To access these settings go to “Dashboard” > “Settings”. We encourage you to explore all the different options you’ll find here and configure WordPress to your needs.
Once you are done with your configuration, click on the “Save Changes” button to ensure your settings are being saved to your database.
That’s it! We hope this tutorial helped you understand how to get started with a WordPress blog.
If you liked this article, then please follow us on Twitter and Facebook. If you have any comments or feedback, use the comment section below.
Disclousure: Our content is reader-supported. This means if you click on some of our links, then we may earn a small commission.