WordPress provides many different ways to add custom CSS and JavaScript to your website. You can use a plugin, the customizer (only for CSS), or create a child theme and enqueue your new Style and JavaScript files. Whichever method you use, with CSS and JavaScript, you can customize the appearance of your WordPress site to reflect your brand and style.
In this tutorial, we are going to show you how to add custom CSS and JavaScript code to your WordPress site in a few easy-to-follow steps.
Let’s get started!
Installing the Simple Custom CSS and JS Plugin
The Simple Custom CSS and JS plugin has more than 400,000 active installations, making it one of the best plugins out there to add custom code to your WordPress site. And it’s our favorite one of all.
It makes it very easy to tweak and modify the appearance of your website by adding custom CSS and JS code without having to modify your theme. It has a lot of features even in the free version. It also has options to add custom HTML.
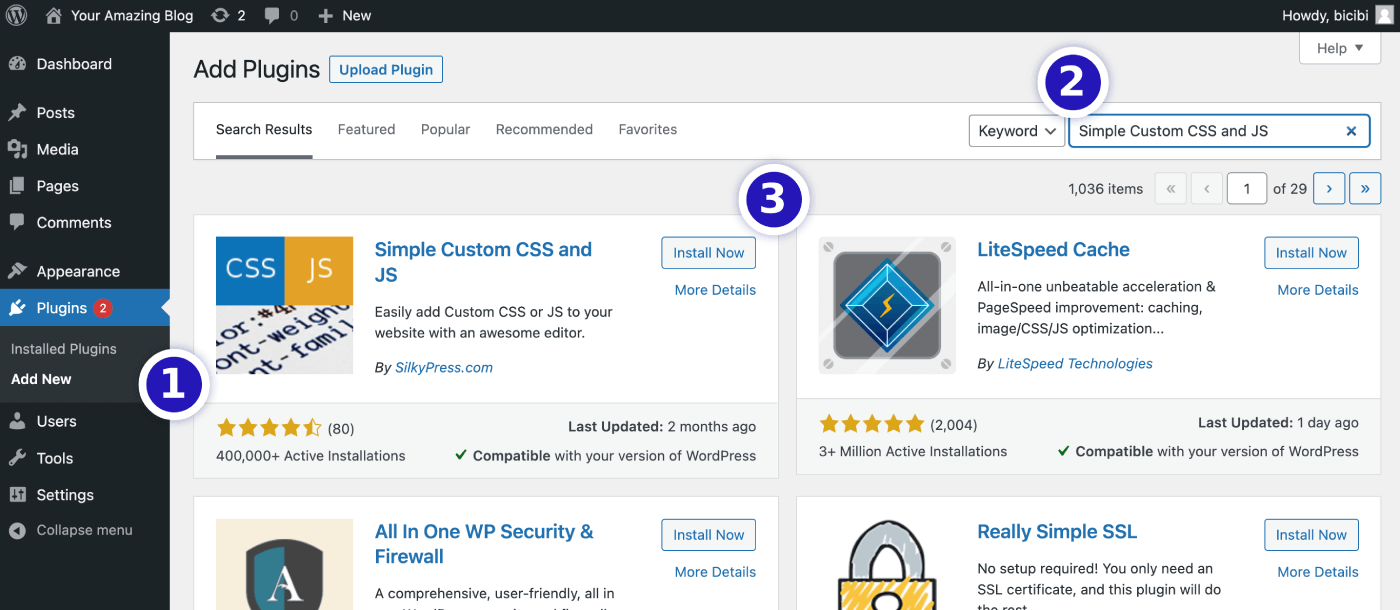
- In your WordPress dashboard, choose “Plugins” > “Add new”.
- Next, type “Simple Custom CSS and JS” in the search bar in the top right corner and wait for WordPress to show you the results.
- After finding the plugin in the results, click on “Install Now”.
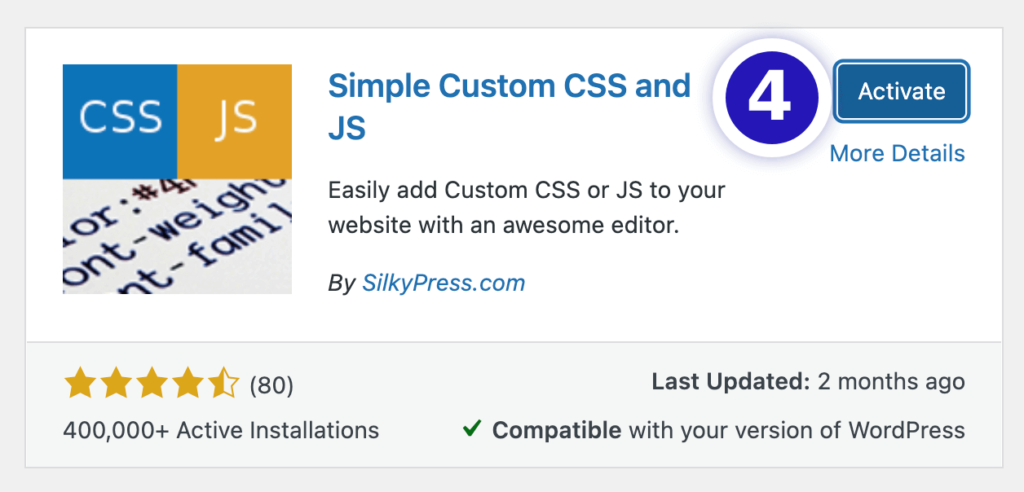
- The plugin is installed, but now we need to activate it to use it. When the installation is finished (this usually takes a few seconds), click “Activate”.
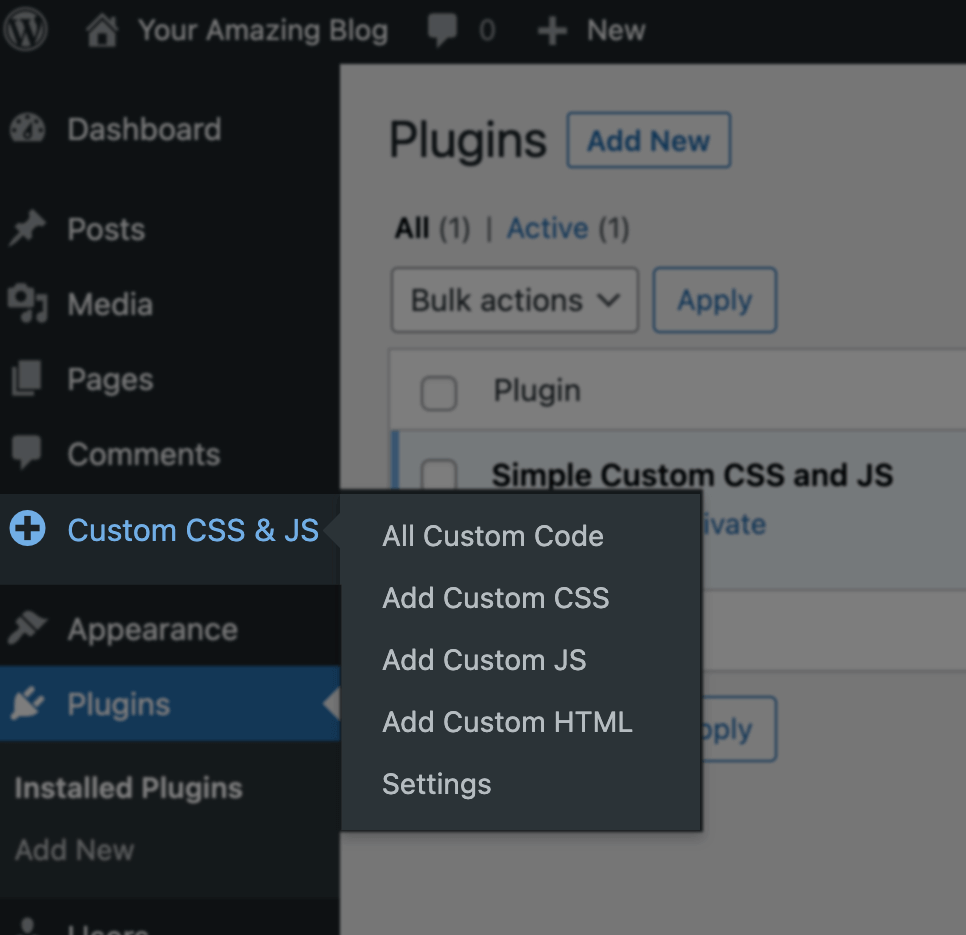
That’s it! We are ready to start using the plugin and adding your custom code. A new item called “Custom CSS & JS” was added to the main WordPress sidebar (you can see how it appears in the image below):
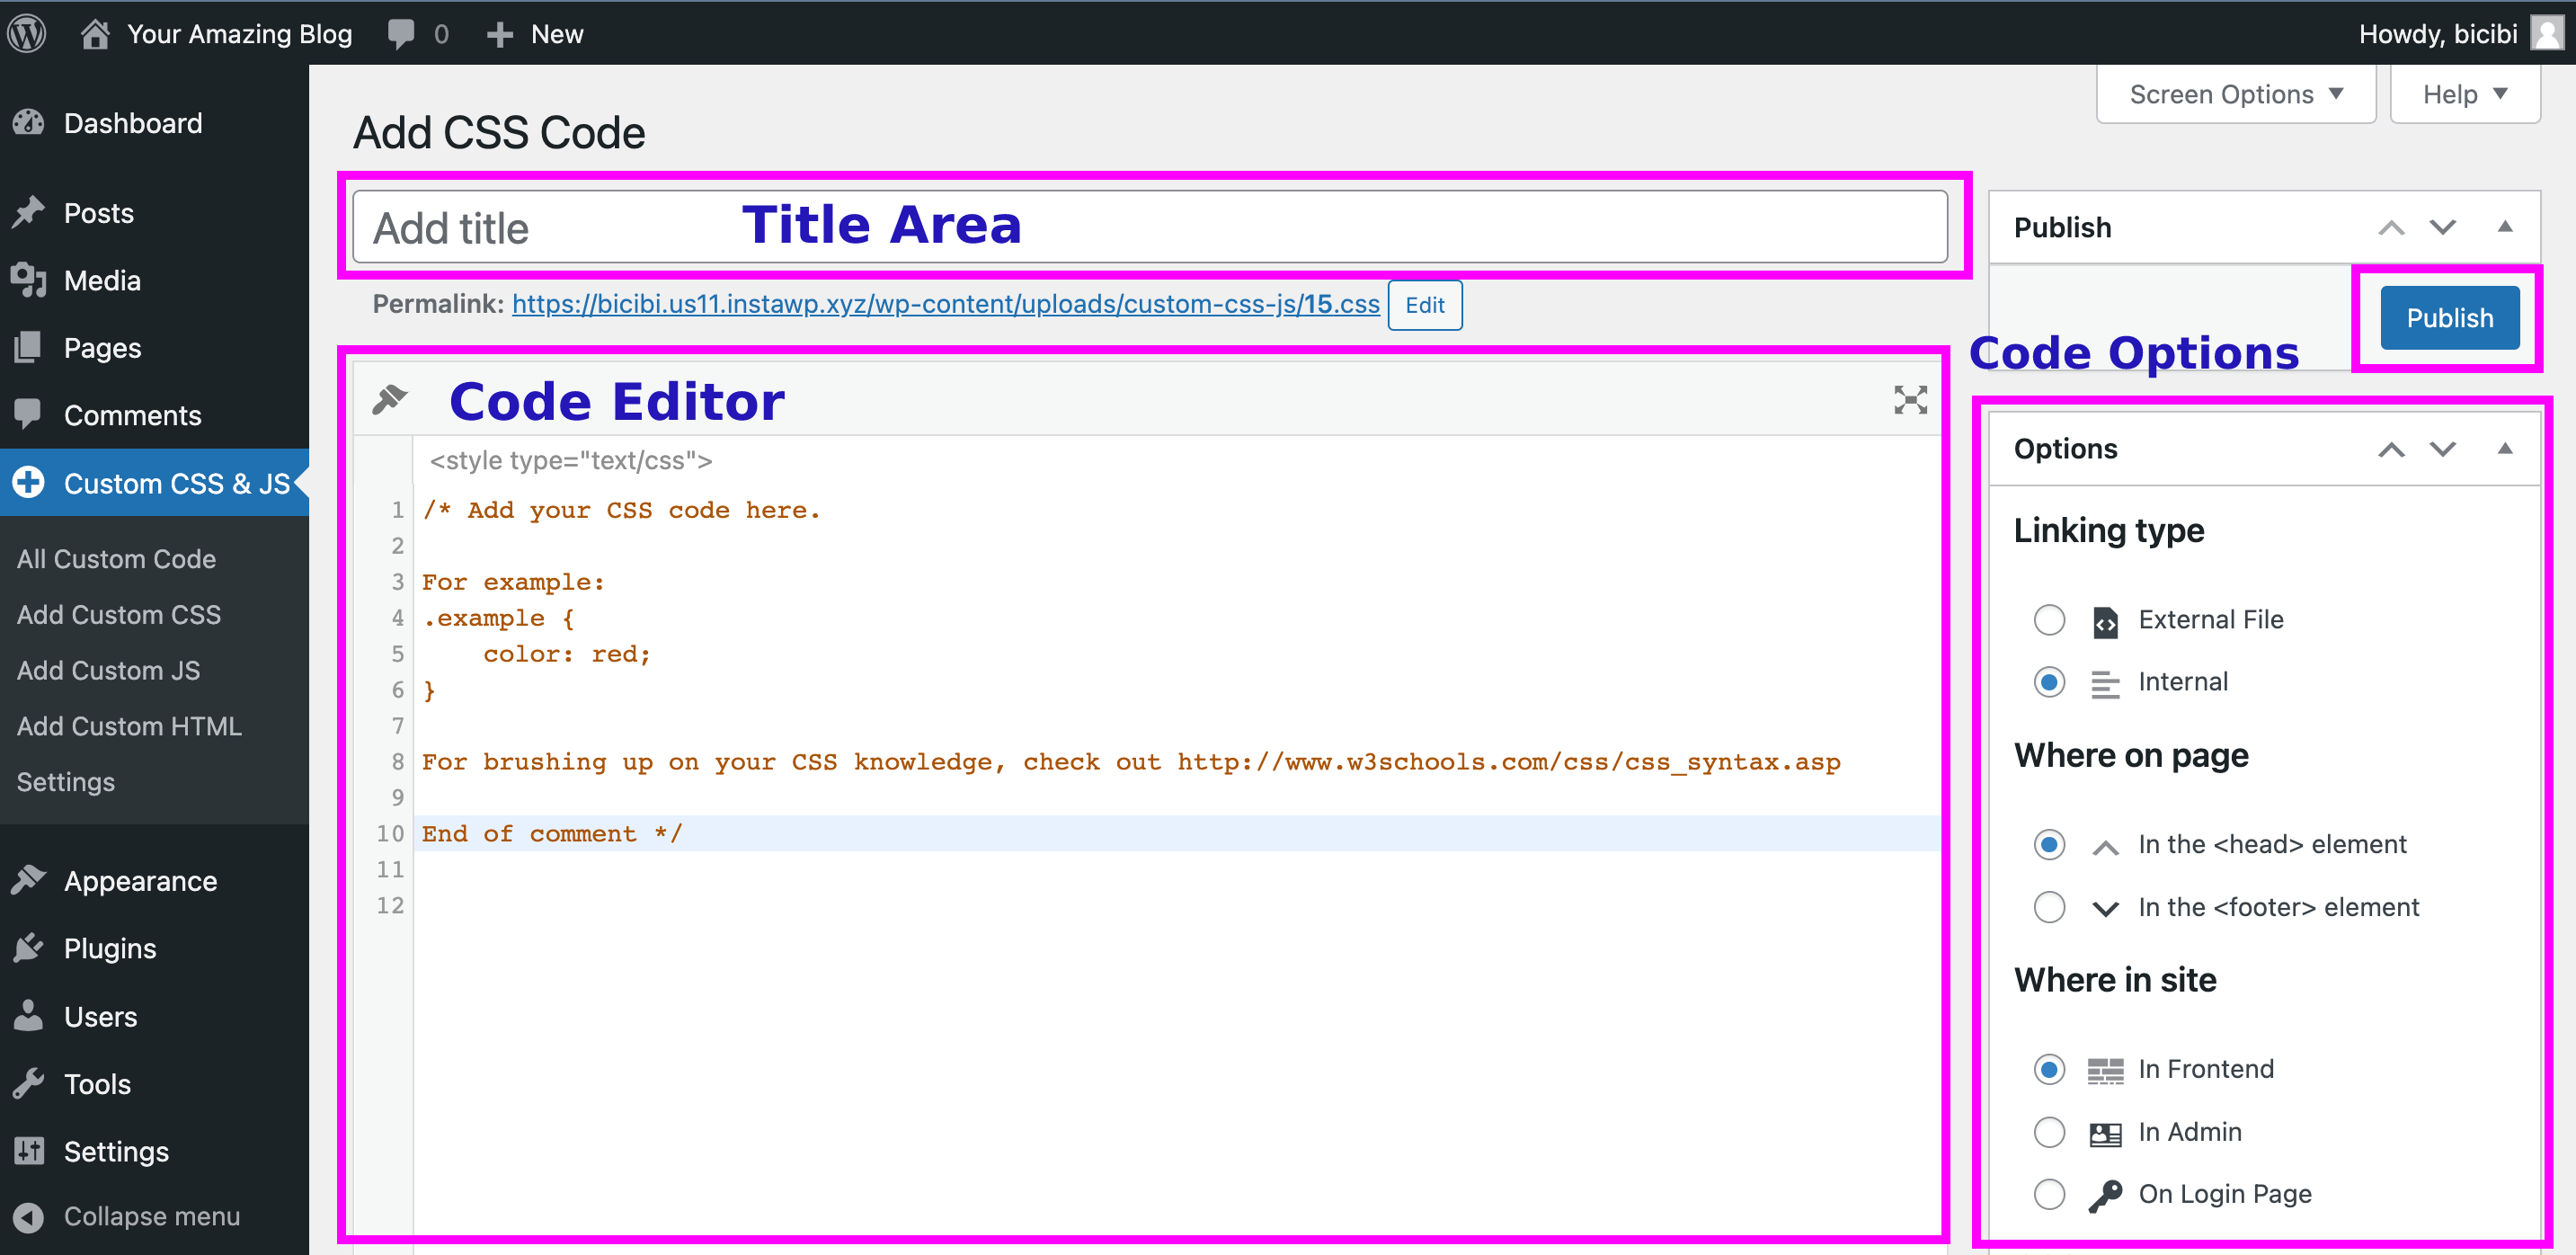
Click on “Add Custom CSS” or “Add Custom JS” and you will be redirected to a new page where you can start writing your own code. The first step is to set a title – using a descriptive title is recommended. This will help you to remember the purpose of your new code.
In the free version of the plugin, you will see some of the available settings on the right side of the page:
- Linking type: If you choose the “External File” option, it will generate a file in the public folder of your site, on the other hand, if you choose “Internal”; it will use the WordPress API to embed the code dynamically.
- Where on page: Here you can select the HTML tag where you want to add the code, you can choose between the <head> element or the <footer> element of your site.
- Where on site: If you are adding code for the public side of your website, you should select the option “In Front”, but you can also select the option “In Admin” if you are customizing the admin area of your WordPress website. There is an extra option “On Login Page” and this is used to customize the WordPress login page.
In the main area of the page, you will see the code editor with some sample code, feel free to remove it to start writing your code from scratch.
Once you are done writing your code, click on the “Publish” button to push your new changes live.
If your site is using a cache plugin or your hosting provider has server cache enabled, don’t forget to clear it. This will help your visitors to see the latest changes applied.
We hope this tutorial helped you understand how to add custom CSS and JavaScript code to a WordPress site. If you liked this article, then please follow us on Twitter and Facebook.